Student Quiz User Manual
All material pertaining to the quizzes are located on the web at http://www.cpp-datastructures.com/. You may access all materials needed to take quizzes as many times as you wish; however, you may only take each quiz once.
Below are instructions for Taking the Exams.
1. To begin taking a quiz, locate the quiz center link at http://www.cpp-datastructures.com/. Double click the link to the quiz center, click the link to the student center, and then click the log in button, next the following screen will be shown.
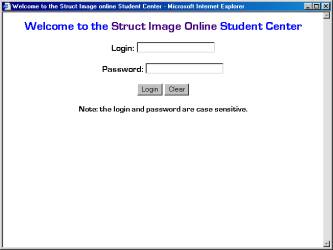
2. Enter your login and password and click the login button.
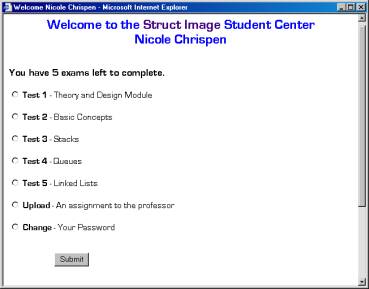
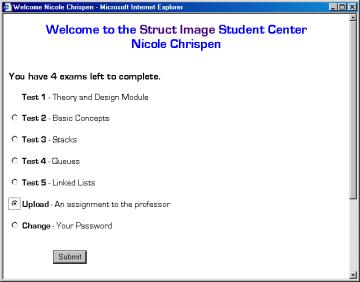
When you first log into the test center an interface will be displayed. From here you have the option of taking an exam, uploading an assignment to your professor, or changing your login password.
Below is a screen shot of what the initial interface should look like:
To take an exam, follow these steps:
1. Using the mouse, select which exam you will be taking.
2. Once the exam has been selected, you can press the submit button to begin the exam.
Note:
See screen shot of warning that will be displayed.
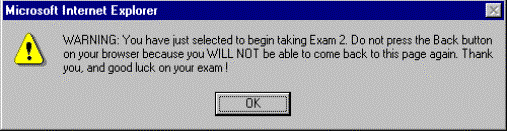
Note: Once you press the submit button you must complete the exam. The program will not allow you to enter the exam twice.
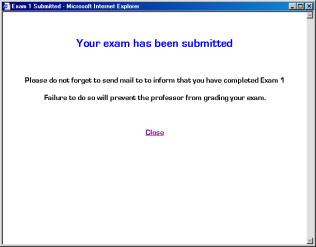
3. After you have completed the quiz, press the submit button to save your results within the application.
4. An interface will be displayed reminding you to send email to your professor, notifying him/her that you have completed the exam. You must send email to your professor. Failure to do so could result in your exam not being recorded. See screen below.
Uploading project assignments
Example of the initial
screen after you log in:
To upload an assignment, follow these steps:
1. Using the mouse, select the upload option. (See above)
2. Once upload has been selected, you must press the submit button.
3. The upload interface will then be displayed. (See below)
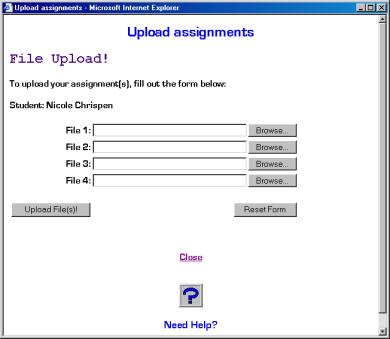
4. Using the BROWSE buttons only; locate your files on your local hard drive or floppy disk. You may submit up to 4 documents at one time.
Example of the screen that will show once you press the browse button:
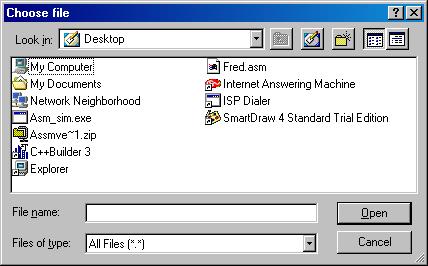
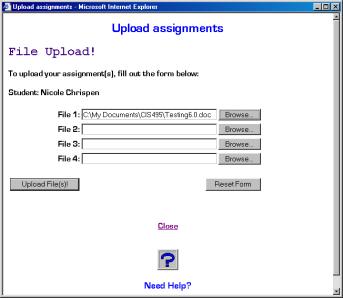
Select the file from the top dropdown and then select the file to upload by double clicking on it. The file name will show in the File Name text box. If this is the file to upload press the open button. The path will be shown as such:
5. If you are required to upload more then 4 files for an assignment, please follow these steps for each of the extra files.
6. Once all of the files have been selected, press the Upload File(s) button to send the files.
7. After uploading is complete, a screen will be displayed summarizing what you have just sent. (See below)
To Change Your Login Password, follow these steps:
1. Using the mouse, select the change option from the test center main menu. (See below)
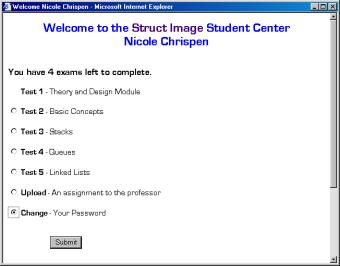
2. Once change has been selected, you must press the submit button.
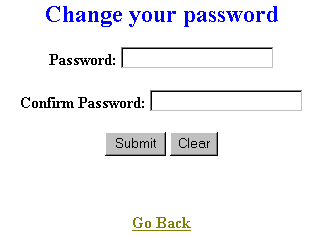
3. The change password interface will then be displayed. (See below)
4. Type your new password in the password box. Then confirm your password by typing your new password in the confirm password box. After you have typed and confirmed your password press the submit button.
5. An interface will be displayed explaining your results. If the passwords do not match or a field has been left blank, an error screen will be displayed. Otherwise the screen will tell that your password change has been successful.
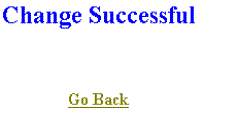
Above is shown if the password has been changed successfully.